Testimonials
Suite A-258
Quick Tips
- Always name the Testimonials Section based on the content it contains so that content managers can easily identify the contents of the Testimonials from the backend.
- Always check what the component will look like live on all devices using the Preview feature before publishing the update.
- This component is available on both Full Width and Two-Thirds Width content sections.
- Content managers will not be responsible for the circle crop around the testimonial photo. This happens automatically.
- Content managers will not be responsible for adding quotation marks to the testimonial because the component includes quotation marks in the background design.
- The structure for testimonials should include student name and major, but not graduation year to keep the content evergreen.
The Purpose of This Component
This component should be used only for Testimonials from students, faculty & staff, and the Worcester State University community. By displaying students’ headshots and words in a way that pops out from the rest of the page, the Testimonial component is a perfect tool for sharing authentic information–and doesn’t leave users feeling like they’ve been marketed to.
Below is an example of the Testimonial Component:


How to Update This Component
When a content manager selects a Testimonial component from the component dropdown list, they will see three tabs within the component’s settings. The first tab reads Component, and this is where content managers will name their components internally on the backend. This setting is for organizational purposes, and this information will never be public to users on the front end.
The text tab they see will be the Testimonials tab, where the Testimonial content will be added.

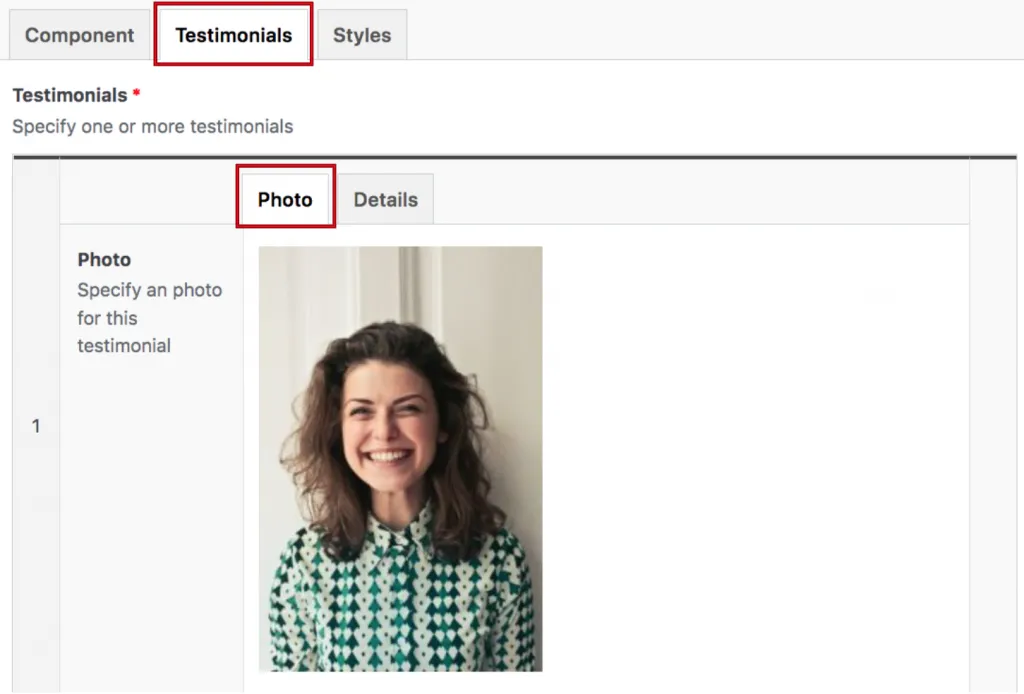
The Testimonial setting that they will edit first is the Photo. The photo can be added by clicking on the Add Image button. This will open the media library. Images added to the Testimonial component should be of the individual who is responsible for producing the Testimonial.

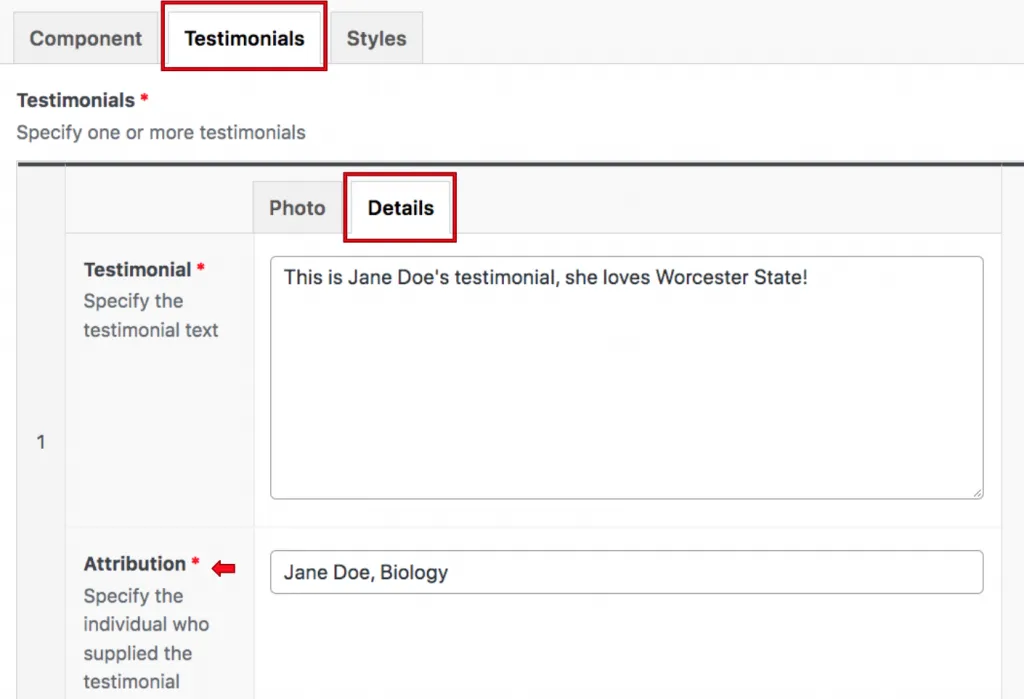
The Details tab is where the rest of the Testimonial settings will be configured. When clicked, the content manager will see where they can enter and specify the Testimonial text. The field below is where the content manager will specify the individual responsible for the Testimonial. The student name and major will be specified, but not the graduating year. The Testimonials added to this component can be recorded by dragging and dropping the numbered columns to the left of the component.
Suite A-258

